Electronic components
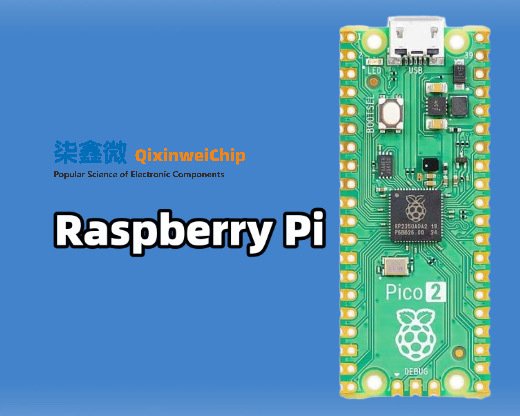
How to Use a Raspberry Pi: From Unboxing to Your First Working Project
Key Takeaways:
- You don't need to be a programmer or engineer to start using a Raspberry Pi—basic computer skills and curiosity are enough to get going.
- Picking the right model and accessories for your actual goal saves you money and prevents frustration before you even begin.
- Mastering one small hardware-plus-code project builds the confidence you need to move from following tutorials to creating your own ideas.
You've probably heard about the Raspberry Pi. Maybe a friend showed you their retro gaming console, or you saw an article about a homemade weather station, and you thought, "That looks amazing, but it's way over my head." Here's the thing: that tiny, credit-card-sized board is actually designed for people just like you. It's a full computer that costs about the same as a pizza dinner, and it's built to help you learn by doing. But if you've never touched a circuit board or typed a command in your life, the gap between unboxing your Pi and making something happen can feel like a canyon.
That's where this guide comes in. We're going to walk you through the entire journey—from choosing the right model and installing the operating system to wiring up your first blinking LED project and fixing it when it doesn't work. No assumptions, no jargon without explanation. By the end, you won't just have a working Raspberry Pi; you'll have the foundation to start dreaming up your own projects.
Getting to Know the Raspberry Pi
The Raspberry Pi is more than just a cheap circuit board. It's an invitation to understand how computers actually work and to build things that interact with the physical world. Before we dive into the hands-on steps, let's get clear on what this little device is and who it's really for.
A Tiny Computer That Sparks Big Ideas
At its core, the Raspberry Pi is a single-board computer—meaning the processor, memory, and essential ports are all on one board. You plug in a power supply, a microSD card for storage, a keyboard and mouse, and a monitor, and you've got a fully functional desktop computer. But what makes it special is the row of metal pins along one edge. Those GPIO (General-Purpose Input/Output) pins let you connect the Pi to physical components like LEDs, buttons, sensors, and motors. Suddenly, your computer can sense the world around it and take real-world action. That's the magic that turns a low-cost computer into a platform for IoT (Internet of Things) gadgets, robots, and home automation.
Who Is This Guide For?
This guide is written for the complete beginner who owns—or is about to own—a Raspberry Pi and doesn't know where to start. You know how to use a regular computer, you can follow clear instructions, and you're willing to try things even if you might mess up. You do not need prior experience with Linux, the command line, Python, or wiring circuits. Everything you need to know will be explained as we go.
Choosing Your Raspberry Pi and Essential Accessories
One of the fastest ways to waste money on a Raspberry Pi project is buying the wrong model or piling up accessories you don't need yet. Let's narrow things down so you get only what matches your real goals.
Understanding Raspberry Pi Models
The Pi family has several active members, and they serve different purposes. Here is a straightforward breakdown to help you decide:
- Raspberry Pi 4 (starting around $35): This is the mainstream choice and the best starting point for most beginners. It has enough processing power to function as a desktop computer, multiple USB ports, dual micro-HDMI outputs supporting two monitors, and plenty of RAM options. If you want to browse the web while also running your projects, this is your best bet.
- Raspberry Pi 400 (around $70): A Pi 4 built directly into a keyboard. It is neat, tidy, and perfect for a desk setup. You lose easy access to the GPIO pins for hardware projects unless you buy a breakout board, so pick this if you mainly want a compact learning computer and are less focused on wiring circuits right away.
- Raspberry Pi Zero 2 W (around $15): Tiny, low-power, and surprisingly capable for its size. It is fantastic for embedded projects where space matters—like building a portable camera or a compact sensor station. The trade-off is fewer USB ports (you will need adapters) and less horsepower for running a full desktop comfortably.
If you are unsure, go with the Raspberry Pi 4 with 4GB of RAM. It gives you room to explore almost any beginner project without hitting performance limits.
Your Shopping List: What You Really Need
Many starter kits bundle items you may never use. Here is the honest minimum, followed by a few thoughtful additions.
Must-have items to make the Pi work:
- USB-C power supply (5.1V, 3A for Pi 4; check specs for your model). Avoid using old phone chargers—they often deliver inconsistent power and cause random shutdowns.
- microSD card (32GB or larger recommended, Class 10 speed). This is your Pi's hard drive.
- micro-HDMI to HDMI cable (for Pi 4 or 400) or a mini-HDMI adapter (for Pi Zero 2 W). Standard HDMI cables plug into most monitors and TVs.
- USB keyboard and mouse. Any basic wired or wireless set works during setup.
- Monitor or TV with HDMI input.
Worthwhile add-ons for hardware projects:
- Protective case: Keeps dust off and prevents accidental shorts from metal objects touching the board.
- Heatsinks or small cooling fan: The Pi 4 can get warm under heavy load. If you plan to run it for hours, cooling helps maintain performance.
- Breadboard, jumper wires, LEDs, and resistors: You will need these for the first project we build together in this guide. Buying them as a small kit costs under $10.
First Boot: Installing the Operating System
Your Raspberry Pi ships as a blank slate. It does not have an operating system built in—you provide that on the microSD card. Don't worry; the process has been streamlined to be about as painless as possible.
Writing Raspberry Pi OS to Your microSD Card
Raspberry Pi OS is the official operating system, and you install it using the free Raspberry Pi Imager application on your regular computer. Here is the straightforward workflow:
- Download and install the Raspberry Pi Imager from the official Raspberry Pi website onto your current PC or Mac.
- Insert your microSD card into your computer using a built-in slot or a USB card reader.
- Open the Imager. Click "Choose Device" and select your Pi model (e.g., Raspberry Pi 4).
- Click "Choose OS" and pick "Raspberry Pi OS (32-bit)"—the recommended version is stable and runs everything a beginner needs.
- Click "Choose Storage" and select your microSD card. Double-check you have the right drive to avoid overwriting something important.
- Click "Write." The Imager downloads the operating system files and writes them to the card. This takes several minutes.
Exploring the Desktop and the Command Line
Your Pi's desktop looks and feels similar to other computers you've used, which makes the transition comfortable. But underneath lies the command line—a text-based way to control the system that feels powerful once you learn a few basics.
A Quick Tour of the Graphical Desktop
The desktop has a taskbar at the top with a familiar "raspberry" main menu button in the upper-left corner. Click it, and you will see categories like Programming, Education, Internet, Sound & Video, and Accessories. Pre-installed software includes the Chromium web browser, a file manager for browsing documents, and programming tools like Thonny (a beginner-friendly Python editor) and Scratch for visual coding.
Opening the Terminal and Running Your First Commands
Click the black terminal icon on the taskbar (it looks like a small monitor with a >_ symbol). A window opens with a blinking cursor—this is where you type text commands directly to the operating system.
Try three commands now to get a feel for the flow:
bash ls
This lists the files and folders in your current directory.
bash pwd
This prints your current working directory path.
bash neofetch
This displays system information like the OS version, uptime, and memory usage.
Your First Raspberry Pi Project: Make an LED Blink
Now we reach the heart of this guide. Blinking an LED may sound simple, but it teaches you core skills: wiring a circuit safely, using the GPIO pins, and writing Python code that interacts with physical hardware. This is the moment your Pi stops being a tiny desktop and starts controlling the real world.
Wiring a Simple LED Circuit with a Breadboard
What you need: one LED (any color), one resistor (220Ω to 330Ω is ideal), and two male-to-female jumper wires.
Making the connections:
- Insert the LED into the breadboard. Note that LEDs have a long leg (anode, positive) and a short leg (cathode, negative). If you reverse it, the LED will not light up.
- Insert one end of the resistor into the same breadboard row as the short leg of the LED.
- Use a jumper wire to connect the other end of the resistor to a ground (GND) pin on the Raspberry Pi. Pin 6 is a common choice.
- Use a second jumper wire to connect the long leg of the LED to GPIO 17 (physical pin 11).
Always double-check your wiring before powering up. A short circuit from misplaced wires can damage the Pi.
Writing the Python Code to Control the LED
Open Thonny from the Programming menu. Type in the following script exactly:
python from gpiozero import LED from time import sleep
led = LED(17)
while True: led.on() sleep(0.5) led.off() sleep(0.5)
Save the file to your Desktop as blink.py and click the green Run button.
Troubleshooting When the Light Stays Off
Nothing happening? Here are the most common culprits and how to fix them:
- LED polarity is reversed: The long leg must connect to GPIO 17; the short leg connects through the resistor to ground. Flip the LED around and try again.
- Wrong pin number in the code: If you wrote
LED(17)but physically wired to a different GPIO pin, the code cannot control your component. - Missing or incorrect resistor: Without a resistor, too much current can destroy the LED and potentially damage your Pi's GPIO pin. Always include a resistor.
- Loose breadboard connection: Gently press each component and wire lead deeper into the breadboard.
- Wrong ground pin: Confirm your ground wire connects to a pin labeled "GND" on the Pi's pinout diagram.
Work through these checks one by one. Fixing a non-working circuit is more educational than building one that works perfectly the first time.
Where to Go from Here: Building on Your Skills
The blinking LED proved you can combine hardware and software. Now you stand at an exciting fork in the road.
More Beginner-Friendly Project Ideas
With your current setup and a few extra inexpensive components, you can build projects that do useful things:
- Weather station: Add a temperature and humidity sensor (like the DHT22) to log data and display readings over time on a simple web dashboard.
- Motion-sensing alarm: Combine a PIR sensor with a buzzer. When someone walks by, your Python script triggers an alert.
- Retro game console: Install RetroPie on a second microSD card to turn your Pi into a classic gaming machine.
- Camera bird feeder monitor: Attach a Raspberry Pi Camera Module to capture photos of visiting birds when a sensor detects motion.
Tapping into the Maker Community for Help and Inspiration
When you get stuck or want to show off something you built, these are your best resources:
- Raspberry Pi Forums: The official forums are searchable and full of detailed troubleshooting threads.
- r/raspberry_pi on Reddit: A busy, helpful subreddit where beginners are welcome.
- Local maker spaces and hackerspaces: Search for one near you for physical workshops and community support.
Every experienced tinkerer started where you are right now—with a little blinking light and a feeling of "I made that work." Pick your next project, dive in, and when you finish it, share your experience in the comments below.
Frequently Asked Questions
What accessories are absolutely essential for a first-time Raspberry Pi user?
You'll need a USB-C power adapter (5.1V, 3A), a microSD card (32GB+), a micro-HDMI cable, and a USB keyboard and mouse. For hardware projects, a breadboard, jumper wires, LEDs, and 220Ω resistors are also necessary. Many starter kits bundle these essentials to save you the hassle of sourcing parts individually.
Which Raspberry Pi model is best for a complete beginner?
The Raspberry Pi 4 with 4GB of RAM is the ideal starting point. It offers full desktop performance, standard ports for your existing monitor and peripherals, and enough power for most beginner projects without the adapter headaches of the smaller models.
Why is my LED not blinking on my Raspberry Pi even after running the Python script?
Check that the LED's long leg connects to GPIO 17 and the short leg goes through a resistor to ground—reversing polarity is the most common mistake. Also verify the jumper wires are pressed firmly into the breadboard and the code references the correct pin number. Skipping the resistor can burn out the LED or damage the GPIO pin.
Do I need prior coding or electronics experience to start using a Raspberry Pi?
No, the Raspberry Pi was designed for beginners with no specialized background. You can learn basic Python and simple circuit wiring step by step using the familiar desktop environment. Many successful Pi users started with zero prior knowledge and built their skills through projects like the blinking LED tutorial.
0users like this.